I'm sorry to announce I'm closing my business, Jay Bee Designs. This is my last post. Since my husbands passing 3 months ago I've purchased a home in Oregon. Time to bond with my family. I look forward to hugs and the cutest great grand babies ever. I'm on a new adventure.
Thanks to all that have supported and followed me. Your truly appreciated.
Joan
Aug 3, 2014
May 8, 2014
New Design Makes Front Cover
My Spring Folly, wall quilt, pattern has been published in The Quilt Pattern Magazine May issue. This is a great, economical, downloadable, magazine. Check it out at www.thequiltpatternmagazine.com


Spring Folly
Thanks for visiting.
Joan
Apr 29, 2014
Quick Placemat
I've always wanted to make a Dresden Plate quilt. After making a few Dresden Plate units I decided it was more than I wanted to tackle. Now what do I do with the few units i made? They've been in a drawer for quite a while. I finally came up with a solution. Applique them onto a store bought placemat. The picture below shows my version of the finished product. I'm thinking of making holiday placemats this way. A pumpkin would be fun or? Use your imagination.
 I think I'll make some napkins to match. If you decide to do this be sure and share the results with us. I will not share your email or add you to a list.
Happy quilting,
Joan
Happy quilting,
Joan
Apr 2, 2014
My Latest Adventure
I've been published in the April issue of The Quilt Pattern Magazine. Check it out at www.quiltpatternmagazine.com. I titled it Tony Tugboat, after my son. I sure had fun with this whimsical pattern.

Thanks for visiting and allowing me to share and brag. :-)
Joan
Mar 28, 2014
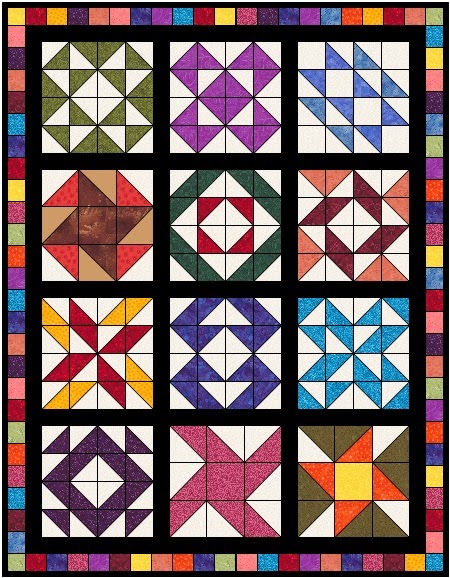
Half-Square Triangle Sampler Part 7
This is the last of the instructions for this sampler. Putting it all together. For the black sashing and first border cut 11 strips 2-1/2" by the width of fabric. From these strips: Note: These cutting dimensions are based on our measurements. You might measure your blocks and rows to adjust for your measurements if they're different.
Cut (8) 2-1/2" x 12-1/2" strips for sashing and (5) 2-1/2" x 40-1/2" strips for border. Sew the remaining 3 strips together, end to end. From this pieced strip cut (2) 2-1/2" x 52-1/2" strips for the long side borders. Sew three blocks and two 2-1/2" x 12-1/2" black strips together as shown below. This creates one row. Repeat to complete the remaining three rows.
 Row 1
Row 1
 First border:
Sew a 2-1/2" x 40-1/2" black strip to the top and bottom of the quilt top. Sew a 2-1/2" x 52-1/2" black strip to the long sides of the quilt top.
Pieced border:
Cut a 2-1/2" strip of each fabric used in your quilt. Sew the strips together lengthwise to make a strip set. Crosscut the strip set into segments 2-1/2" wide.

Cut (8) 2-1/2" x 12-1/2" strips for sashing and (5) 2-1/2" x 40-1/2" strips for border. Sew the remaining 3 strips together, end to end. From this pieced strip cut (2) 2-1/2" x 52-1/2" strips for the long side borders. Sew three blocks and two 2-1/2" x 12-1/2" black strips together as shown below. This creates one row. Repeat to complete the remaining three rows.
Row 1
Referring to the photo below sew rows 1 and 2 together using a 2-1/2" x 40-1/2" black strip. Repeat for rows 3 and 4. Sew the 4 rows together with a 2-1/2" x 40-1/2" black strip in between.
Sew a 2-1/2" x 40-1/2" black strip to the top and bottom of the quilt top. Sew a 2-1/2" x 52-1/2" black strip to the long sides of the quilt top.
Pieced border:
Cut a 2-1/2" strip of each fabric used in your quilt. Sew the strips together lengthwise to make a strip set. Crosscut the strip set into segments 2-1/2" wide.
Sew the segments together end to end to make the length needed for the top and bottom borders. Sew these borders to the quilt. Repeat to make the length needed for the long side borders.
Finishing:
After quilting our sampler we chose to bind it in black. Cut 6 strips 2-1/2" by width of fabric for the binding. Sew these six strips together end to end. Attach binding using your favorite method.
If you have any comments, questions or to share photos of your finished project feel free to contact me at jaybeehive@yahoo.com
Thank you for joining me on this sampler adventure.
Enjoy,
Joan
Mar 21, 2014
Half-Square Triangle Sampler Part 6
Here are the last two blocks of the sampler pattern. Blocks #9 and #10. Each block uses sixteen 3-1/2" x 3-1/2" Half-Square triangle units. Instructions for the Half-Square triangle units are in my February 14th post.


Block #9 Block #10
Next week I will share the sashing and border instructions with you.
There are a number of extra blocks that can be made with Half-Square triangles. Below is a bonus block to play with.
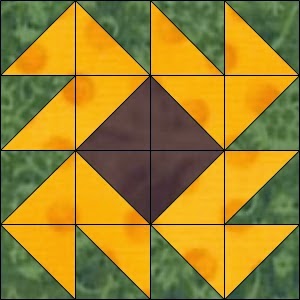
Bonus block
Here's some homework. :-) Why not make some extra units, lay them out on a table, and create a new block by twisting and turning them? Might be fun.
Till next week happy quilting.
Joan
Block #9 Block #10
Next week I will share the sashing and border instructions with you.
There are a number of extra blocks that can be made with Half-Square triangles. Below is a bonus block to play with.
Bonus block
Here's some homework. :-) Why not make some extra units, lay them out on a table, and create a new block by twisting and turning them? Might be fun.
Till next week happy quilting.
Joan
Mar 14, 2014
Half-Square Triangle Sampler Part 5
Today brings us to blocks #7 and #8. Each block uses sixteen 3-1/2" x 3-1/2" Half-Square triangle units. Instructions for the Half-Square triangle units are in my February 14th post. As shown below block #7 uses three colors and #8 two colors.


Block #7 Block #8
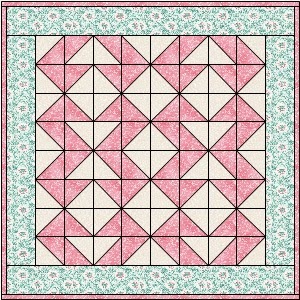
Here's another way to use a block. I chose block #8 to make a baby quilt. Four blocks and a border create this quilt that measures approximately 32" x 32". The border in my sample measures 4" wide, finished. By using novelty print fabric or colors to match your decor this makes a great table topper.
 The following is a challenge for you. The quilt below shows a different version of block #8. See if you can figure out how I created the blocks.

Block #7 Block #8
Here's another way to use a block. I chose block #8 to make a baby quilt. Four blocks and a border create this quilt that measures approximately 32" x 32". The border in my sample measures 4" wide, finished. By using novelty print fabric or colors to match your decor this makes a great table topper.
I'm hoping you share some of your ideas and pictures of your samples with me. Please note, I do not add you to a list or pester you with email. I may respond once to acknowledge your message. I can be contacted at jaybeehive@yahoo.com
Thanks again for joining me.
Stay tuned for blocks #9 and #10 next week.
Joan
Subscribe to:
Posts (Atom)