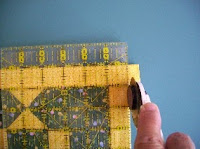
Step 1. Measure the length of your quilt. Add at least 3" to this measurement. Cut two strips of binding 2-1/2" wide by your measurement length. Example: If the length of my quilt is 30 inches I would cut two strips of binding 2-1/2" x 33". Press binding strips in half lengthwise, wrong sides together. Note: Binding is always attached to the long sides first. If the quilt is square then attach to any two opposite sides. With quilt facing up lay a binding strip on top of the quilt, with at least a 1" tail of binding extending beyond both ends and matching raw edges of the binding with the raw edges of the quilt. Sew together using a 1/4" seam. Repeat with the opposite side. Don't trim ends yet.
Step 2. Press binding out over the stitching, away from the quilt.
Step 3. Trim the binding even with the quilt.
Step 4. Measure the width of your quilt including the attached binding. Add 3 inches to this measurement. Cut two pieces of binding this length. Attach both short sides in the same manner as the long sides. Press binding out over the stitching, away from the quilt. Do not fold binding to the back. This will be done in step 6 and 7.
Step 5. Trim the four binding ends even with the side binding as shown in photo below.
Step 6. Fold both long sides to the back first and using an applique stitch sew it to the backing fabric. NOTE: Always fold back the first two attached bindings. In this case whats described as the long sides. This prevents any raw edges on the ends.
Step 7. Fold the top and bottom (short) sides to the back. Use an applique stitch to sew the binding to the backing fabric.
I don't use this method for scalloped edges or mitered borders. In these cases I would use the continuous binding method.
Why not give this a try. Make a little sample to test my instructions. This really works well and I've never had problems with wavy edges. If you have any questions feel free to contact me at jaybeehive@yahoo.com.
Happy quilting and enjoy the day,
~ Joan ~


